6.13. Single Sign On with Microsoft EntraID
Since v.1.0.3.44
Enabling Single Sign On with Microsoft EntraId in ChronoScan registered Applicaction
To utilize Microsoft Entra ID Single Sign-On with ChronoScan, it must be enabled within the global system parameters window, and the following settings must be configured:
* If you use a restrictive firewall, you must add the following domains to your firewall's allowlist:
-
https://login.microsoftonline.com
-
https://graph.microsoft.com
-
https://aadcdn.msftauthimages.net
-
https://aadcdn.msauthimages.net
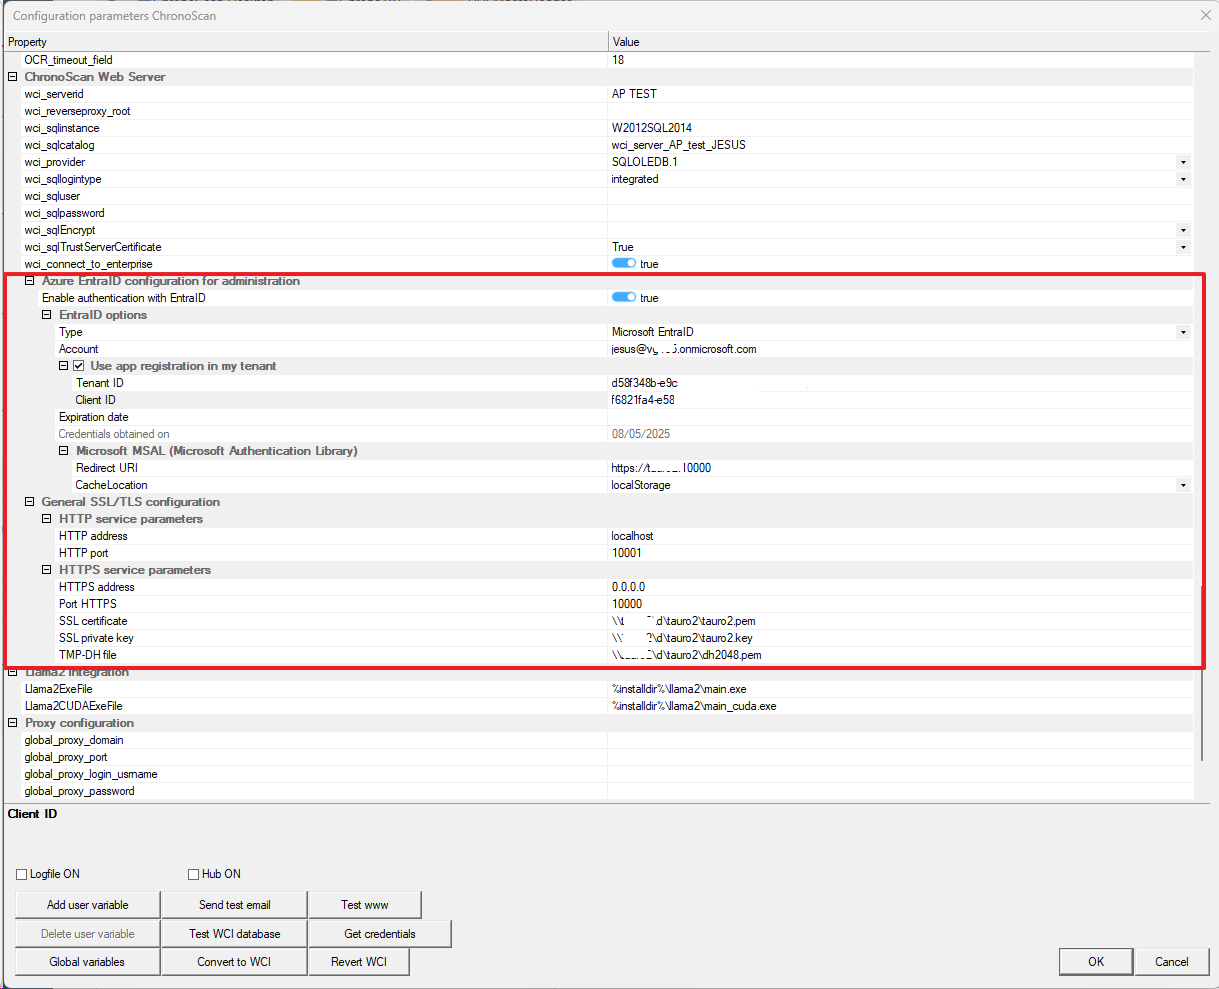
Azure EntraID configuration for administration
-
Enable authentication with EntraID:
-
This parameter is a toggle switch (true in the image) that enables or disables integration with Microsoft EntraID (formerly Azure Active Directory) for user authentication. If set to true, the application will attempt to authenticate users via EntraID.
-
-
Type: Indicates the type of external authentication provider. In the image, it's "Microsoft EntraID".
-
Account: Displays the EntraID account being used for the integration (e.g., iesus@8ttdklonmicrosoft.com). This is the user or service account configured in EntraID to interact with the application.
-
Here is were the user must obtain the token credentials for the registered application in Azure.
2. Prerequisites for Integration: For ChronoScan to authenticate with your Microsoft Entra ID, the application itself needs to be registered within your Azure Entra ID tenant. This process, typically performed by an Azure administrator, involves:
1. Signing in to the Azure Portal with an administrator account.
2. Registering ChronoScan as a new application.
3. Obtaining the essential application credentials (e.g., Application (client) ID, Directory (tenant) ID) generated during this registration. These credentials are then used within ChronoScan's configuration to establish trust and enable Single Sign-On.
-
Expiration date: Indicates the date until which the EntraID account's configuration or credentials are valid (e.g., 05/14/2027). This is important for managing security certificates or tokens.
-
Microsoft MSAL (Microsoft Authentication Library):
-
Redirect URI: This is the URL to which EntraID will redirect the user once authentication is successful (e.g., https://server:10000). It must match the URL configured in the application registration within the Azure EntraID portal.
-
CacheLocation: Defines where MSAL will store authentication tokens and other session data.
-
localStorage: Allows maintaining the session across different browser tabs or even after closing and reopening the browser. Tokens persist in the browser's local storage.
-
sessionStorage: Only maintains the session while the current browser tab is open. Tokens are cleared when the tab or browser is closed.
General SSL/TLS configuration:
-
-
HTTP address: The IP address or hostname where the application's HTTP service will listen for connections (e.g., localhost). localhost means it will only accept connections from the same computer where the application is running.
-
HTTP port: The port number on which the HTTP service will accept connections (e.g., 10001).
-
HTTPS service parameters:
-
HTTPS address: The IP address where the application's HTTPS (secure) service will listen for connections (e.g., 0.0.0.0). 0.0.0.0 means the service will listen on all available network interfaces on the machine.
-
Port HTTPS: The port number on which the HTTPS service will accept secure connections (e.g., 10000).
-
SSL certificate: The path to the SSL certificate file (.pem or similar format) used to encrypt HTTPS communications (e.g., \\server\id\tauro2\tauro2.pem).
-
SSL private key: The path to the private key file that corresponds to the SSL certificate. This is essential for decrypting communications (e.g., \\server\id\tauro2\tauro2.key).
-
TMP-DH file: The path to a file containing temporary Diffie-Hellman (DH) parameters (e.g., \\server\id\tauro2\tauro2dh2048.pem). These parameters are used for secure key exchange in SSL/TLS handshakes, enhancing security (especially Perfect Forward Secrecy).
Once the credentials have been obtained and ChronoScan is registered within your Azure application, ChronoScan will be able to retrieve information from your application to grant or revoke access permissions for your application users to ChronoScan, This part is managed in the ChronoScan web (enterprise) application users section:
-
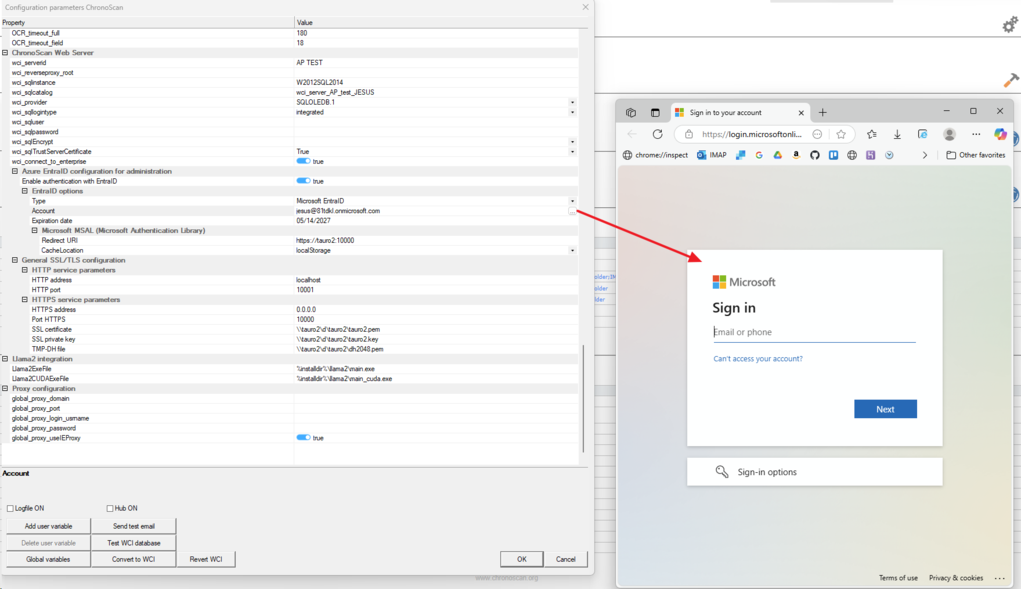
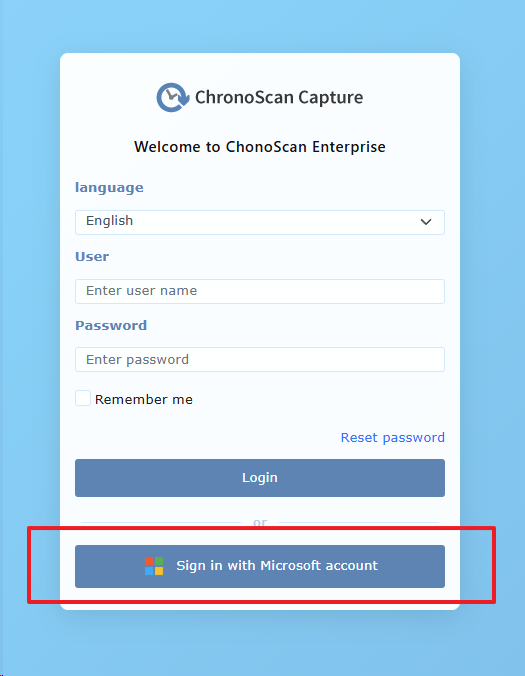
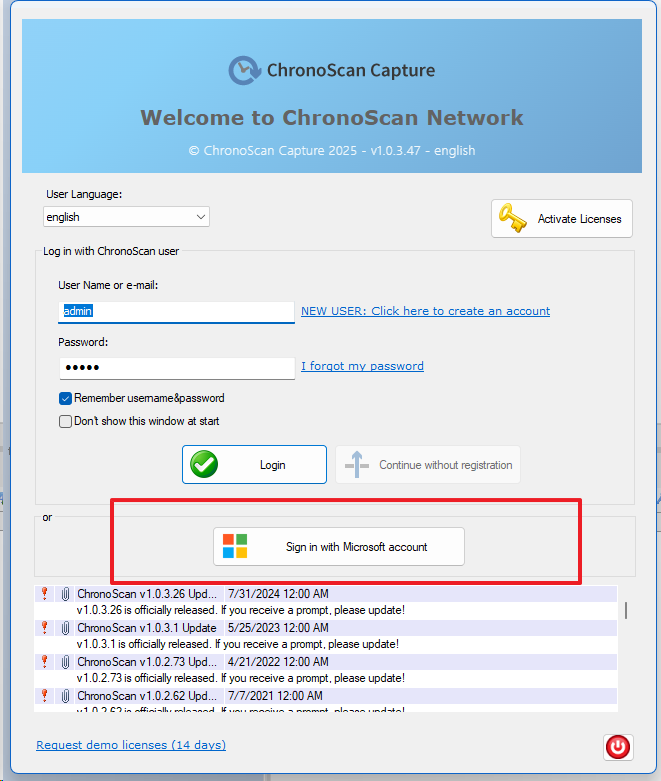
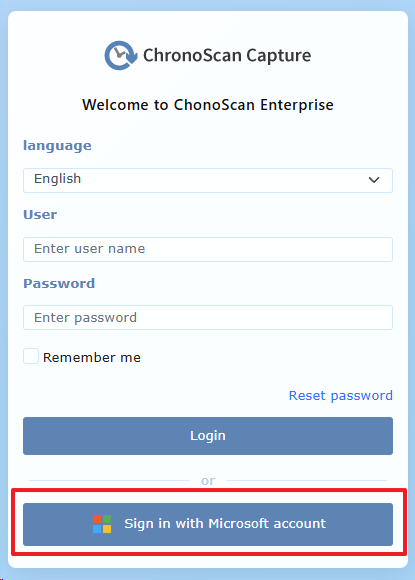
Log in to ChronoScan Web. Since Entra ID authentication is now enabled, the login form will display a "Sign in with Microsoft account" button as shown below:
If this is your first time logging in after obtaining credentials and configuring Entra ID <> ChronoScan integration, no Entra ID user permissions have been granted yet. Therefore, it is important to note that you must log in with a ChronoScan administrator account initially in order to assign permissions to your Azure users
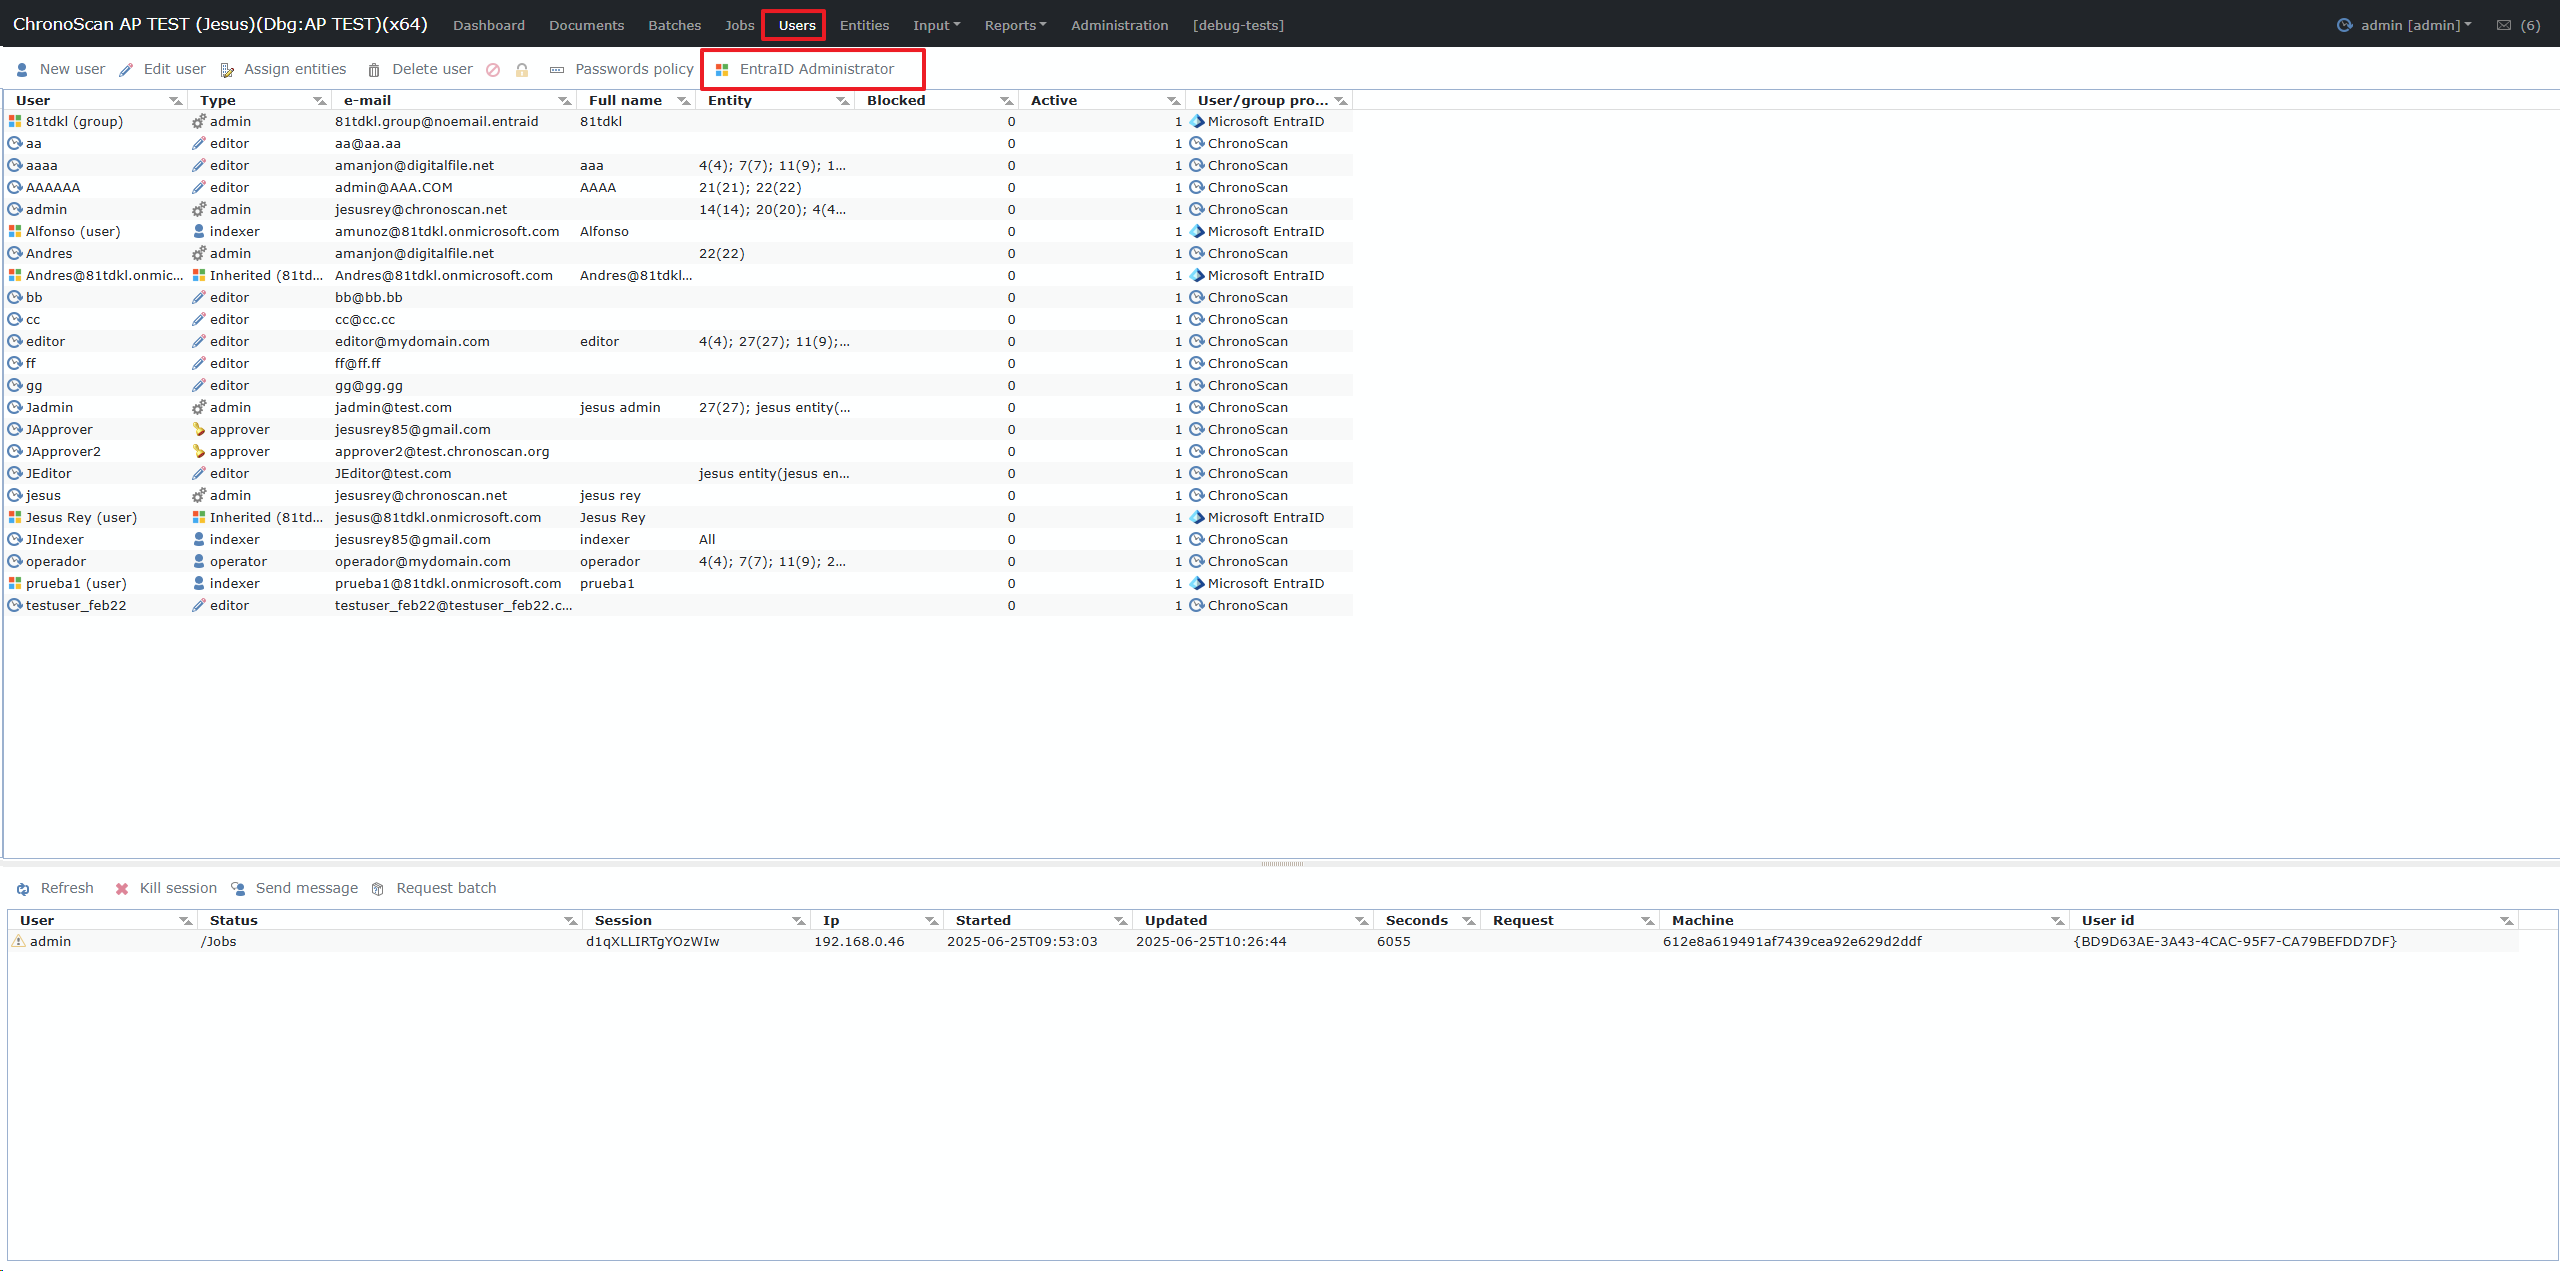
Once Logged In with your chronoscan administrator you can now access the users section, the new "EntraID Administrator" Button is now enabled :
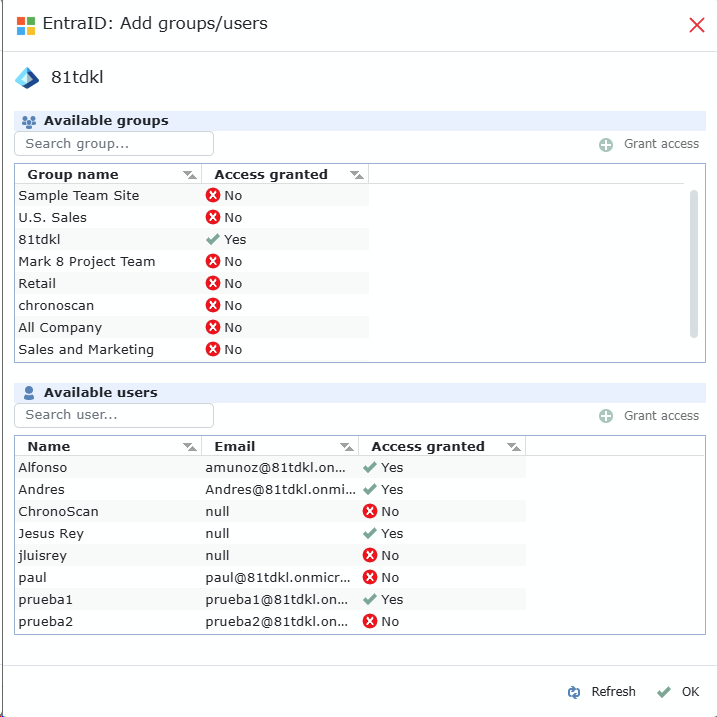
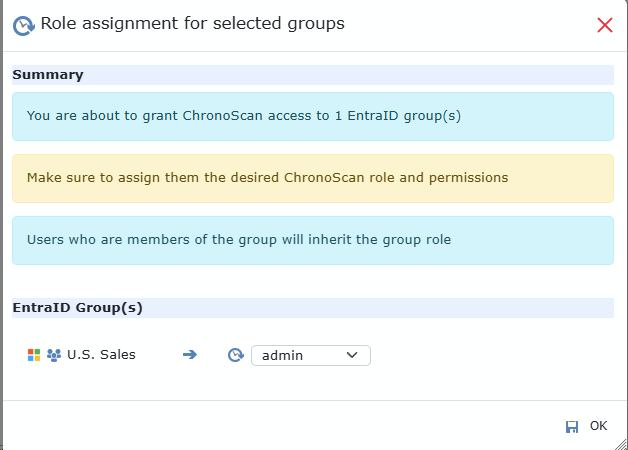
Click that button to open the administrator were you can grant access to either single users of your azure application or whole groups.
When granting access to a group or individual user, you must assign the specific role they will have in ChronoScan, such as admin, editor, indexer, operator, etc.
Note that users who access ChronoScan through group-based permissions will inherit the role assigned to that group.
With access enabled, users federated from Entra ID can log in to ChronoScan (Enterprise and Desktop applications) using their Microsoft credentials.
Assigning these users or their respective groups to specific Entities within ChronoScan is a separate step that can be completed post-login, mirroring the process for existing ChronoScan users.
Desktop:
Web: