Here the user is presented with Data Capture fields customization. ChronoScan comes with a preset for Invoices with the Line Capture option or for Generic Fields.
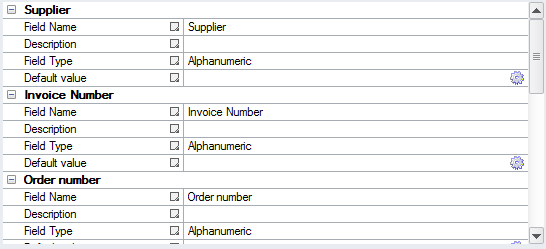
Each data capture field can have different properties such as "Field Type" and "Default Vaule" to serve many different purposes. Customization of data capture fields is easily done.
After clicking Next the user is presented with the Output Settings window.
Invoice Fields
Invoice preset fields. If the user is processing invoices this a very good starting preset for the Data Capture Fields that will be needed. Customization is very easily done.
This option enables Grid capturecustomized for invoices with a details line and amount, balance and some fields and rules to check the information. When selecting this option the user don't need to setup an xGrid from scratch. More on capture grids here.
If the fields needed for the data capture are not invoices the user should select this preset and customize the fields to fit the data that will be extracted.
To sort out the different capture data fields the user can move them up or down by selecting each data field by clicking on it and clicking on the up and down arrows to move it up or down in the list.