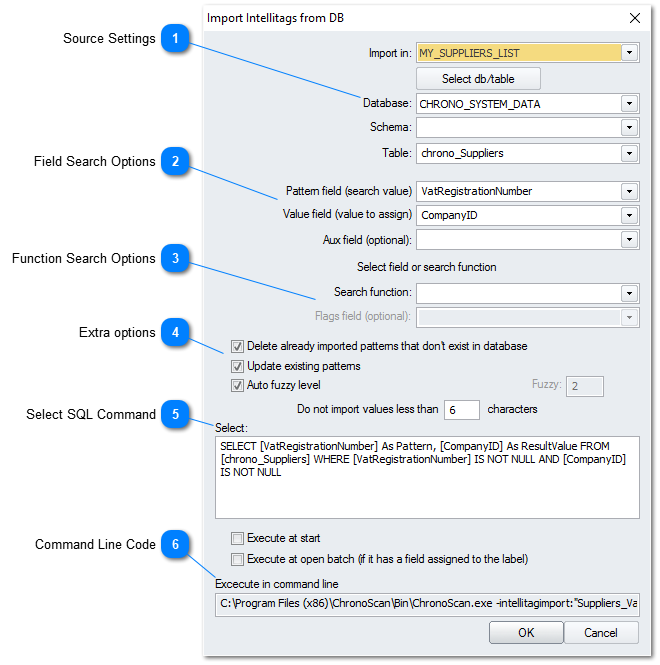
On the Import Intelli-Tags from DB window you can select from where on the database you want to pull your Intelli-Tags from. Select the Database connection you want to pull data from (Note: You need to have a database connection setup first. More on Database Connections here.) and define a function for what to look for and click OK to start importing data and creating Intelli-Tags. If you get an error review your settings and make sure the database settings are valid.
Source Settings
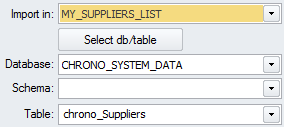
Use the Source Settings to define where ChronoScan will be pulling data from. The Select DB/Table button will open up the Database Navigator Window where you can select the desired database connection and table to use.
If you want to use field search to look for the desired data use those two menus to select the desired fields from the database to capture values from.
If you want to use a function to look for the desired data use those two menus to use template functions. You can also customize the function on the Search Function panel.
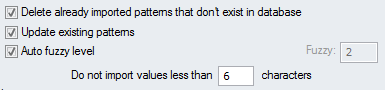
Using those extra options you can set the desired Fuzzy Search level if you don't trust ChronoScan's automatic Fuzzy Search level algorithm. You can also choose to remove existing patterns from ChronoScan if they don't exist on the selected Database or to update already existing patterns using the Database data.
After setting the desired options for your intelli-tag import save the configuration, close it and open it again. The Command Line code will be updated and it will allow you to run the intelli-tag import configuration from the command line. For instance this can be used on a scheduled task built from the windows scheduled tasks tool.