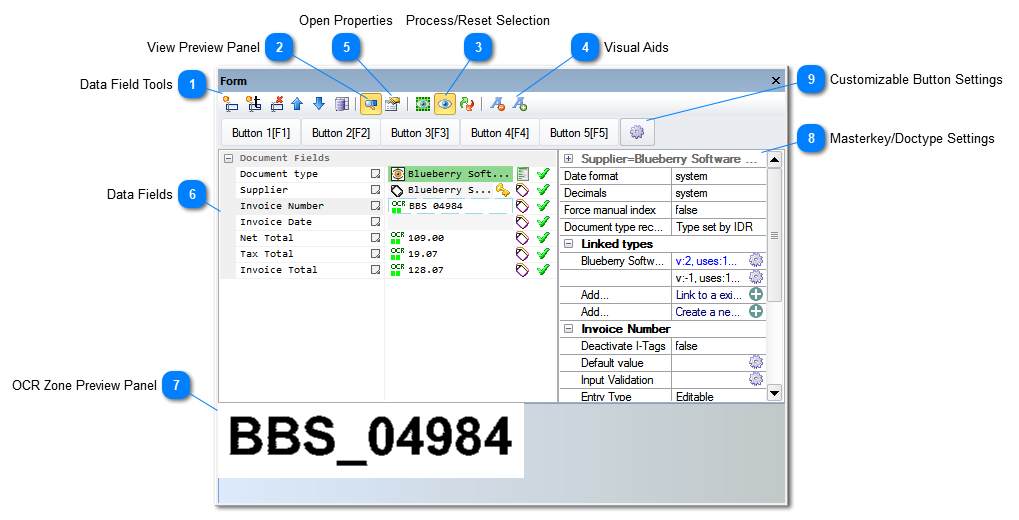
The Form View shows the data fields and the data captured by the OCR Zones for the currently selected document. You can use the Form View to manage your Data Fields, connect them to a Database, set OCR Zones to specific Data Fields and edit the captured data. It displays the same information as the Grid View but only for the currently selected document.
Data Field Tools
With the Data Field Tools it is possible to manage and sort existing Data Fields. It is also possible to connect the fields to an external database by clicking on the Link With External Database button, it will open the Database Search Window. The Add New Field Using OCR function will ask you to create a capture field on the document instead of manually typing the name of the Data Field.
The View Tools will open custom view panels. You can open/close the OCR Zone Image Panel and open the Object Properties for the selected Field. The OCR Zone Image Panel shows the image captured by the OCR Zone set for the current Data Field. You can use it to make sure the correct area is selected and to troubleshoot poor image quality documents.
Here you can either process the selected documents or Reset them to default. Resetting a document to default will clear all the captured data and read it all over again. All OCR Zones, Grids and Triggers will remain.
Click on this button to open the properties for the currently selected data field where you will find a few options. Find more on the Object properties Panel section.
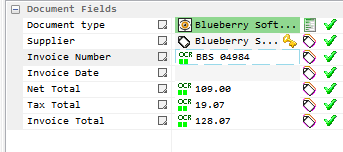
On the Data Fields area all the created Data Fields are displayed along with the data captured. You can see the extracted data. To it's left you will find the OCR Engine Confidence Level and to it's right you will find the Validation Output. Green is good, red is bad.
The OCR Zone Image Panel can be hidden using the View Zone Image button. When you select a Data Field that have an OCR Zone attached to it this panel will display the image captured by it. t is very useful to troubleshoot poor image quality documents.
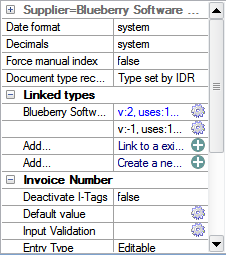
This panel will display important information for masterkey setups. Intelli-tags, document types and masterkeys can be easily managed here as well as admin notes.