3.3.4. V1.0.0.40 Now With Alfresco Document Scanning and CMIS Support Added
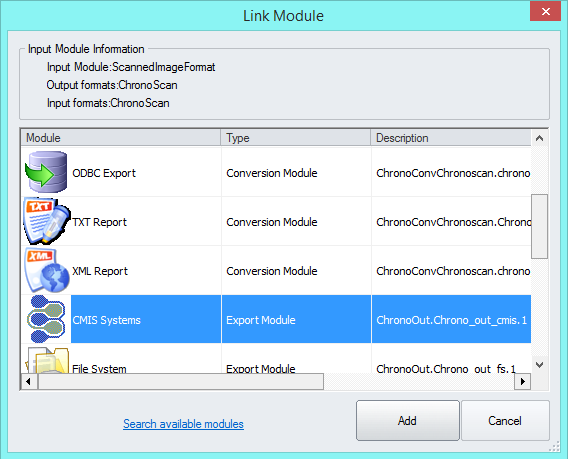
ChronoScan has released the universal CMIS Output Module. This module allows you to directly export to any compatible CMIS server and has some special features that allows you to directly set Alfresco properties and aspects.
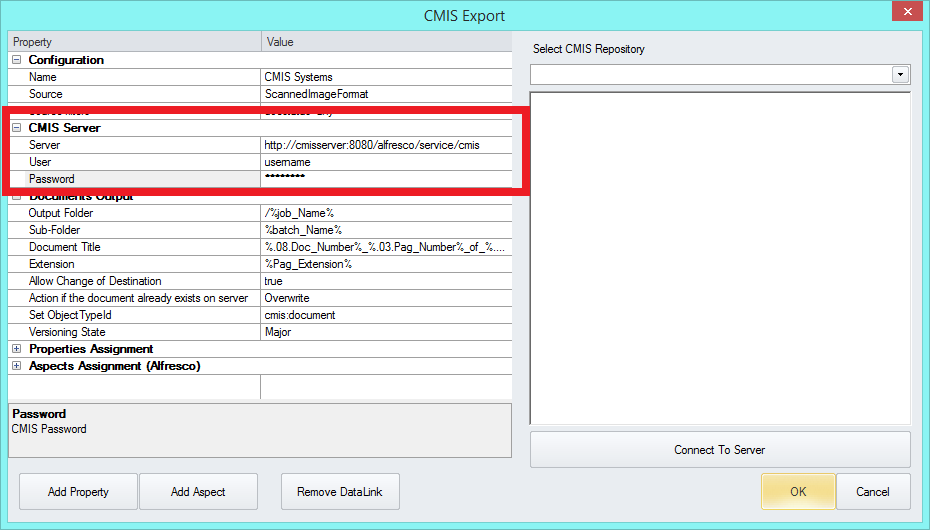
Now configure your CMIS url and your username/password to connect to your CMIS server:
The CMIS server should point to the CMIS interface (atom type). Example:
http://localhost:8080/alfresco/service/cmis
CMIS Server configuration.
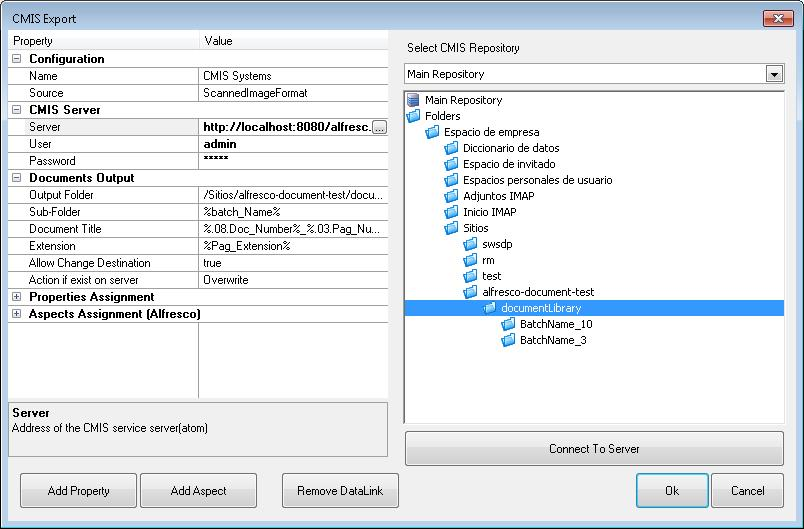
Click on the Connect to Server button to check your credentials and retrieve a list of valid workspaces. This may take a while if your system contains a lot of folders:
CMIS Repositories shown after connection is tested and ready.
ChronoScan will create the folder structure indicated by the user. For example, if you want the system to export to a folder with year/month put this in the Sub-Folder field on the Document Output section:
%station_date_YYYY%/%station_date_Month_Name%
That will create the folder structure 2013/July inside the folder selected as the primary Output Folder.
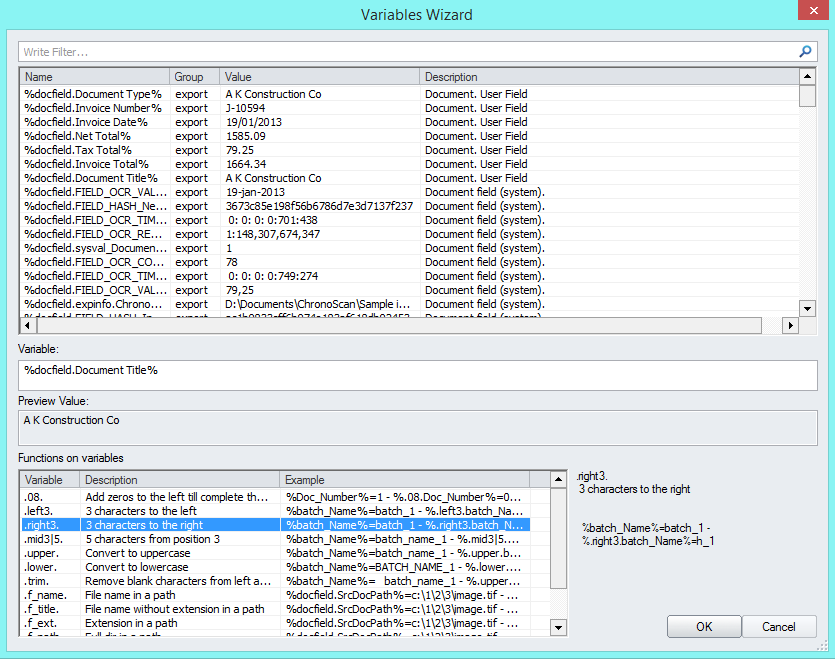
You can set the document name to any standard or field value on ChronoScan using the Variables Wizard window:
Variables Wizard window. This selection will set the document name on the remote system to the value of the “Document title” field of your Batch.
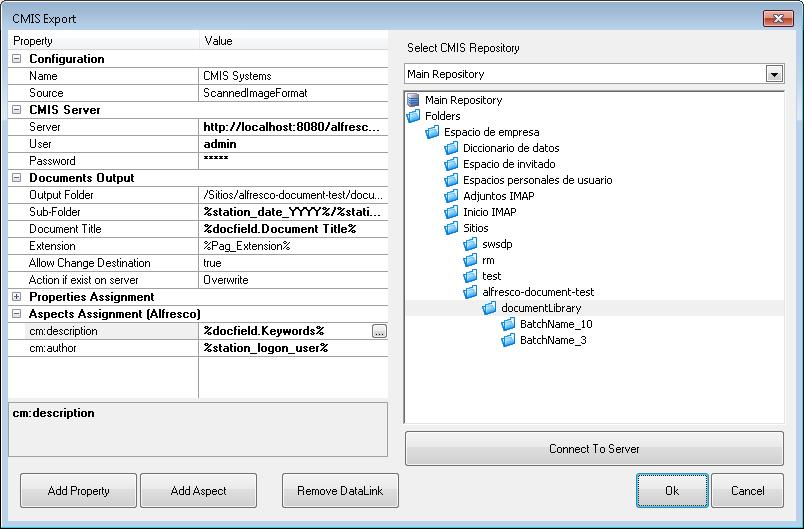
In Alfresco you can set custom Aspects / Properties by clicking on the Add Property or the Add Aspect button and inserting the name of the custom aspect/property, assigning the desired value to it:
CMIS Export window.
Now that your CMIS Export Module is already configured, click OK and save the new configuration by clicking on the Save button.
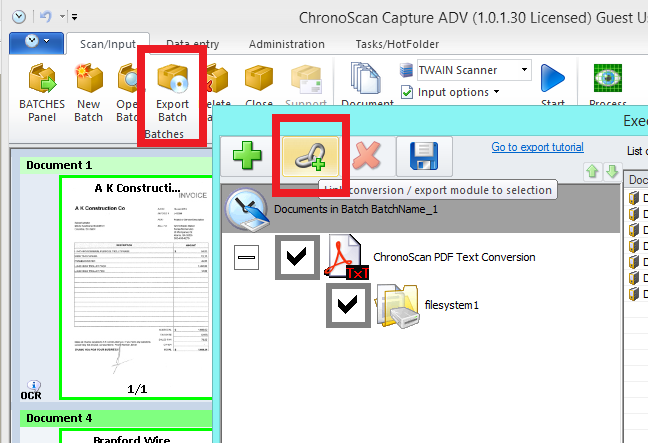
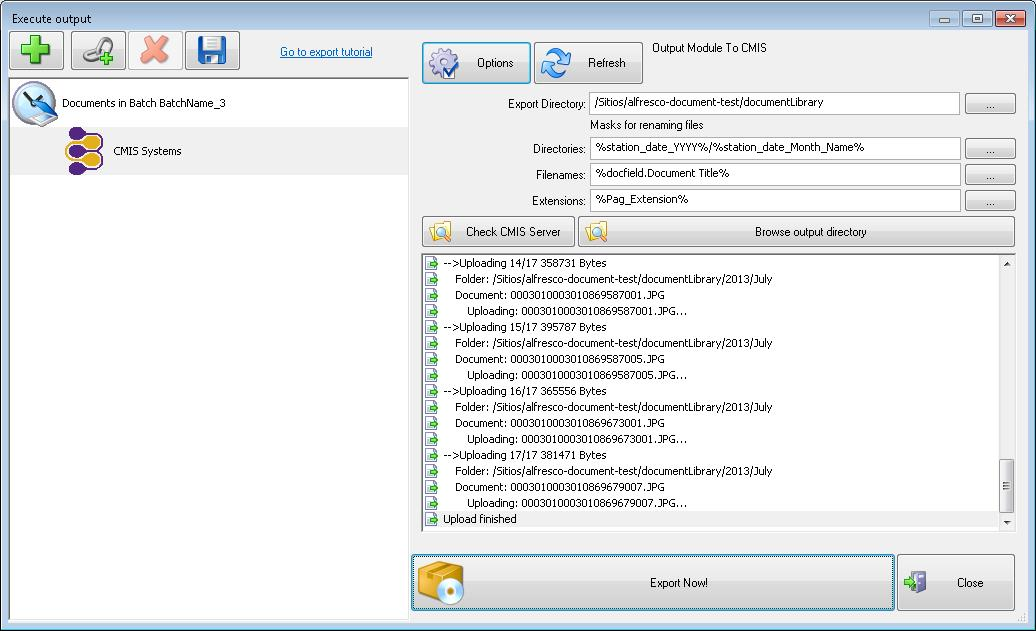
Test it by clicking on the Export Now! button:
Click on the Export Now! button to test the settings.
You will see a final report window displaying the result of the operations and the native errors returned from the CMIS server.